Connect a Local Ollama Model to ClawNest
Install Ollama locally and connect it to a new AI assistant in dash.clawnest.ai using this practical step-by-step guide.
What you'll need
- A computer with at least 32 GB RAM or a GPU with 24 GB+ VRAM to run a local model
- A free Tailscale account — tailscale.com
- A ClawNest account — dash.clawnest.ai (free Starter plan works)
- About 15 minutes to complete the setup
Part 1: Install Ollama Locally
Install Ollama and Tailscale on the machine that will run your local model.
- 1
Install Ollama from the official download page
Go to ollama.com/download, choose your operating system, and complete the installer.
- 2
Start Ollama with network access enabled
Run OLLAMA_HOST=0.0.0.0 ollama serve so it listens on all network interfaces, not just localhost (port 11434). Setup varies per OS — see the Ollama FAQ for details.
- 3
Download a model that can handle agent workflows
Run ollama pull qwen3:32b as a safe default. You can select another supported model later.
- 4
Install Tailscale on the Ollama machine
Download Tailscale from tailscale.com/download, install it, and log in. This creates a secure private network between your devices.
- 5
Find your Tailscale IP address
Go to login.tailscale.com/admin/machines and note the IP address (e.g. 100.75.36.94) of the machine running Ollama. You will need this in Part 2.
Example commands
ollama pull qwen3:32bOLLAMA_HOST=0.0.0.0 ollama serve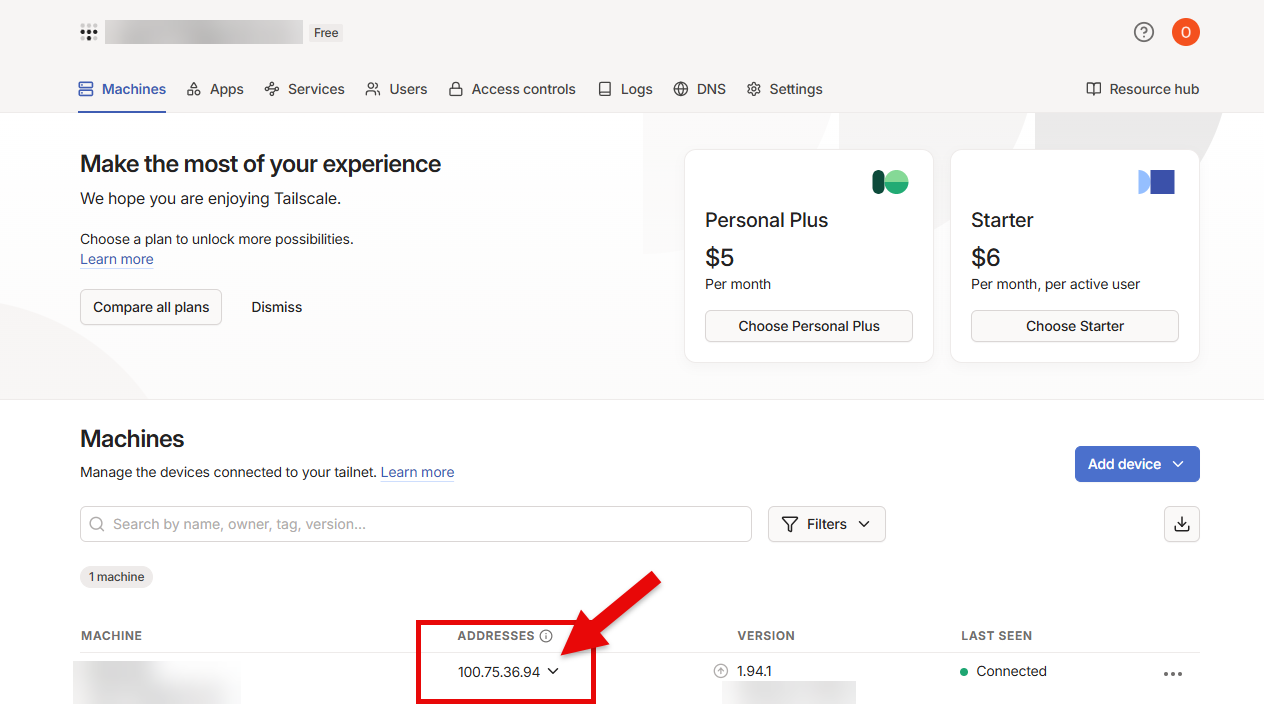
Official downloads: ollama.com/download | tailscale.com/download
Part 2: Create an Assistant in ClawNest Dashboard
Once Ollama is ready, log in and connect your local model when creating the assistant.
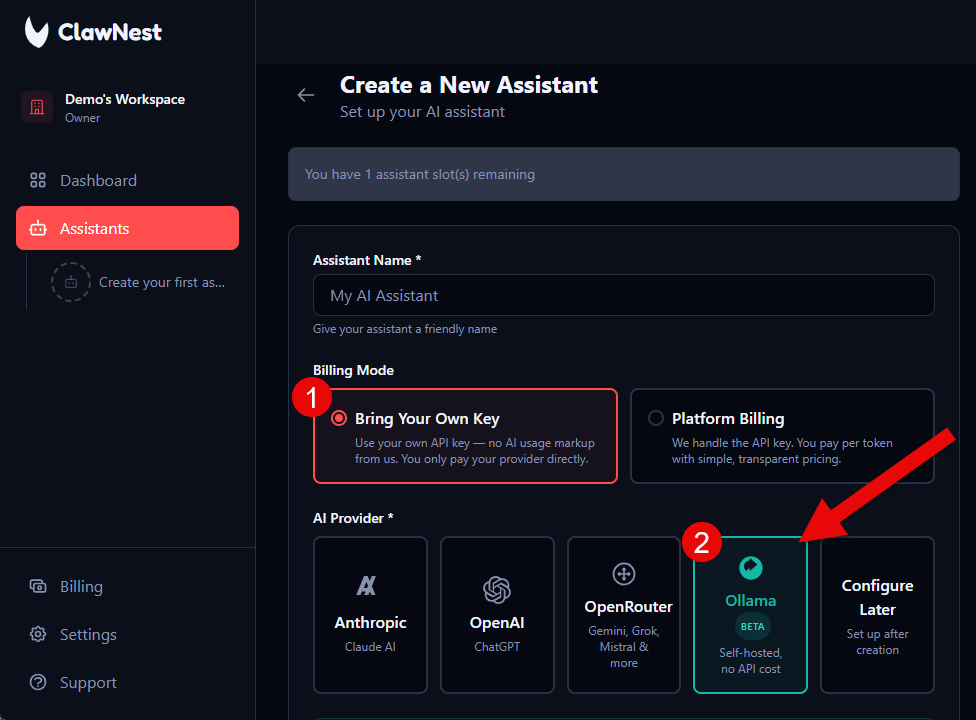
- 1
Set Billing Mode to Bring Your Own Key
In the assistant form, choose "Bring Your Own Key".
- 2
Choose Ollama as AI Provider
In the provider section, click "Ollama".
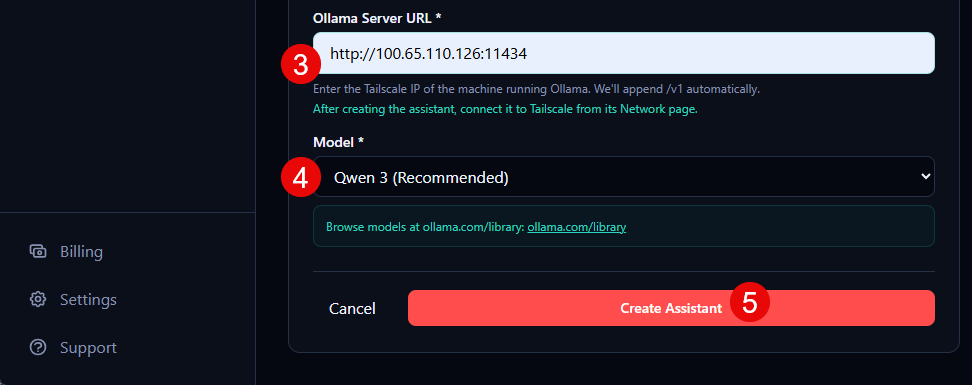
- 3
Add your Ollama Server URL
Enter your URL, for example http://100.x.x.x:11434 (your Tailscale IP or hostname). /v1 is appended automatically.
- 4
Select the model
Choose the same model you downloaded in Ollama, for example `Qwen 3`.
- 5
Click Create Assistant
Review the form and click "Create Assistant" to finish setup.
Log in first at dash.clawnest.ai
Part 3: Connect Your Assistant to Tailscale
After creating the assistant, connect it to your Tailscale network so it can reach your local Ollama instance.
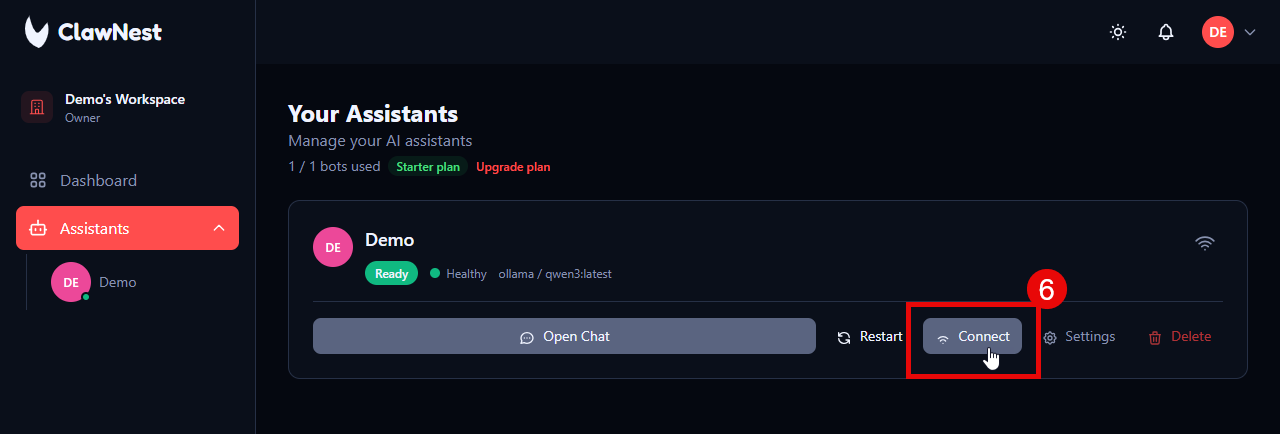
- 6
Click Connect on the assistant
On the assistant card in the dashboard, click the "Connect" button.
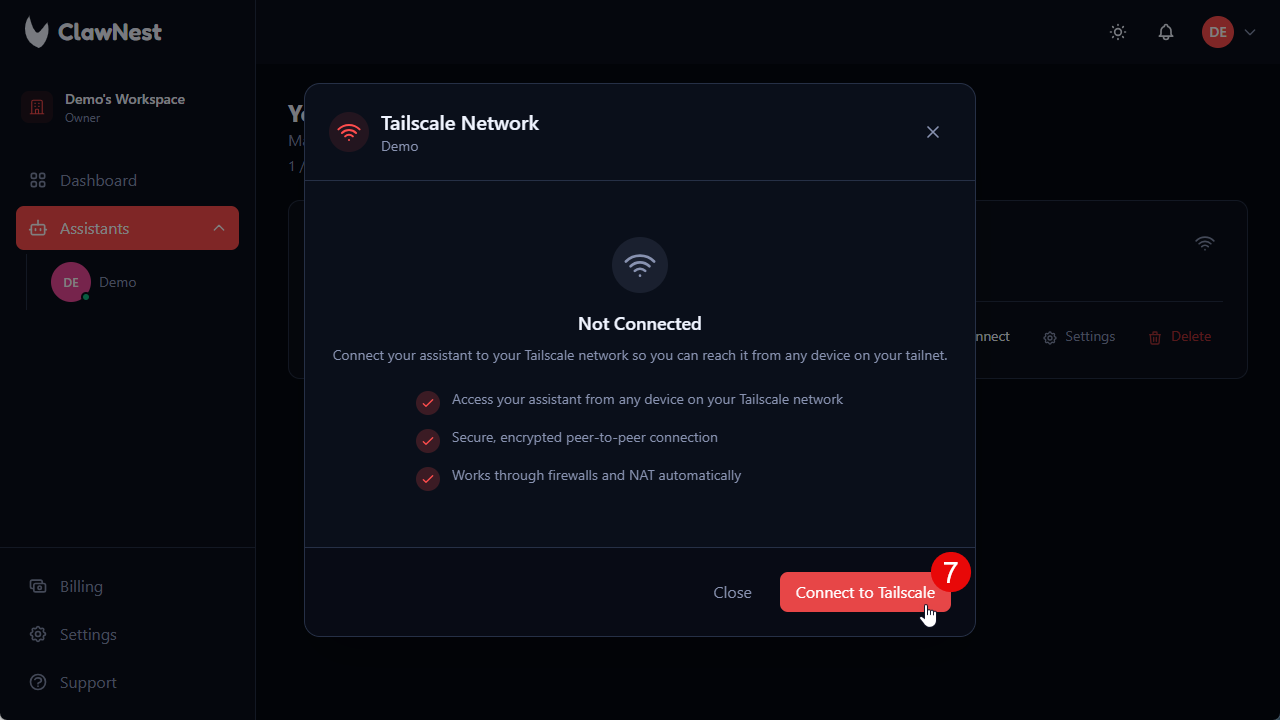
- 7
Click Connect to Tailscale
In the Tailscale Network dialog, click "Connect to Tailscale".
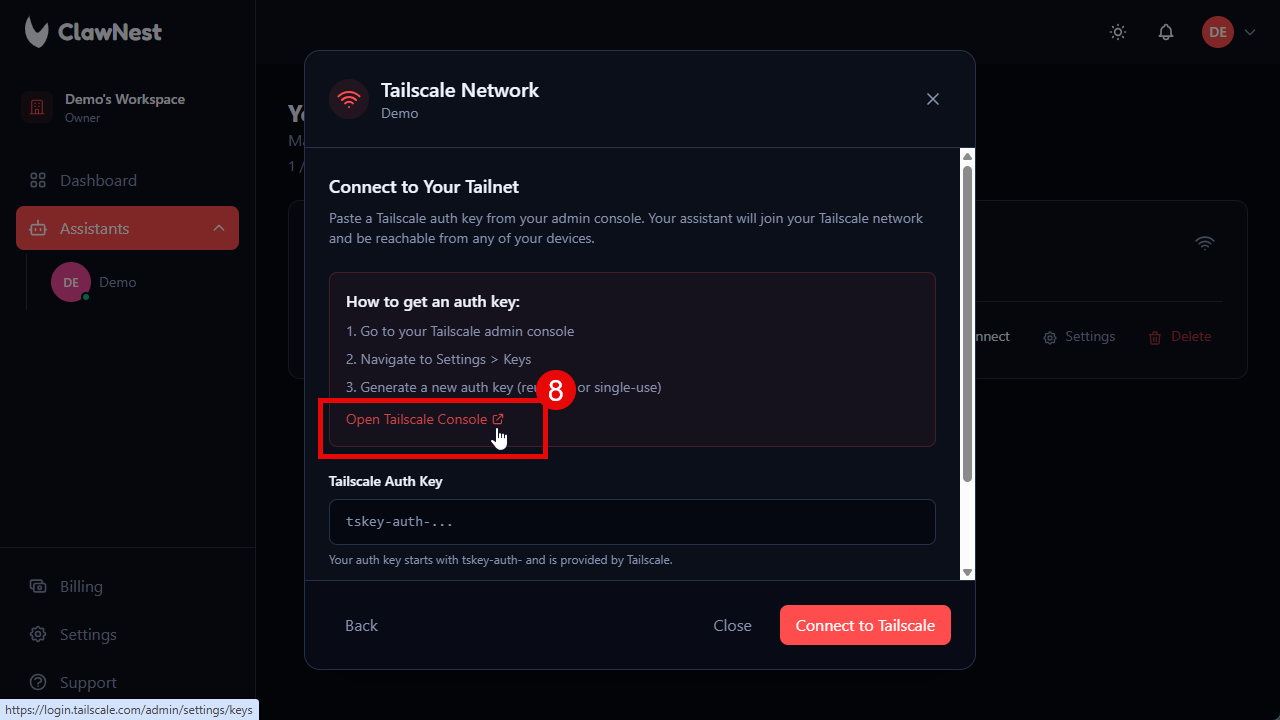
- 8
Open Tailscale Console to get an auth key
Click "Open Tailscale Console" to open the Tailscale admin panel where you generate an auth key.
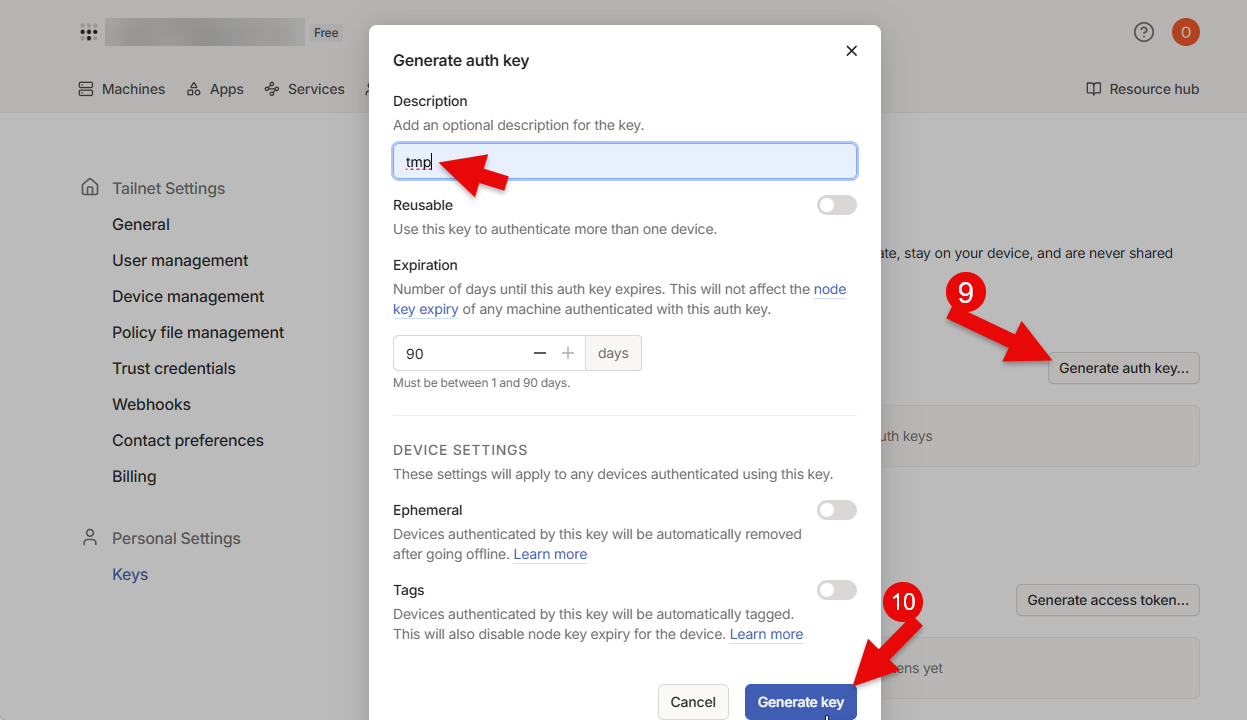
- 9
Generate an auth key in Tailscale
In the Tailscale console, click "Generate auth key...", give it a description, then click "Generate key". Copy the generated key (starts with tskey-auth-).
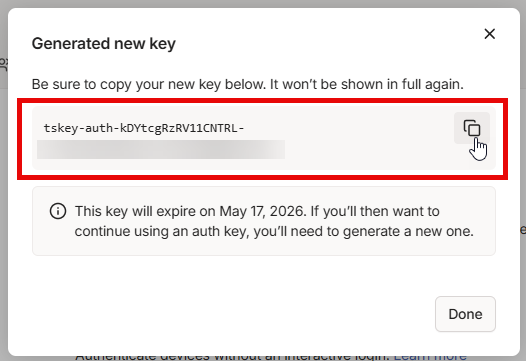
- 10
Copy the generated auth key
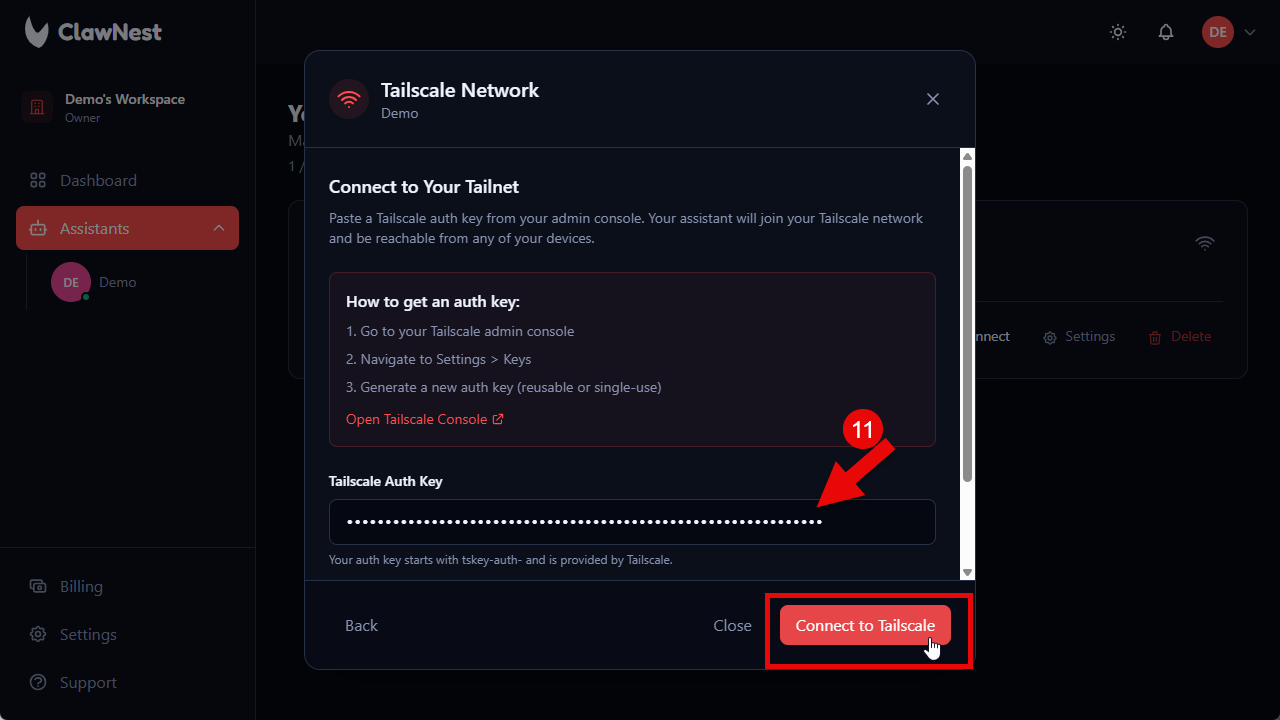
Copy the key from the dialog. It will only be shown once.
- 11
Paste the auth key and connect
Back in ClawNest, paste the auth key into the field and click "Connect to Tailscale".
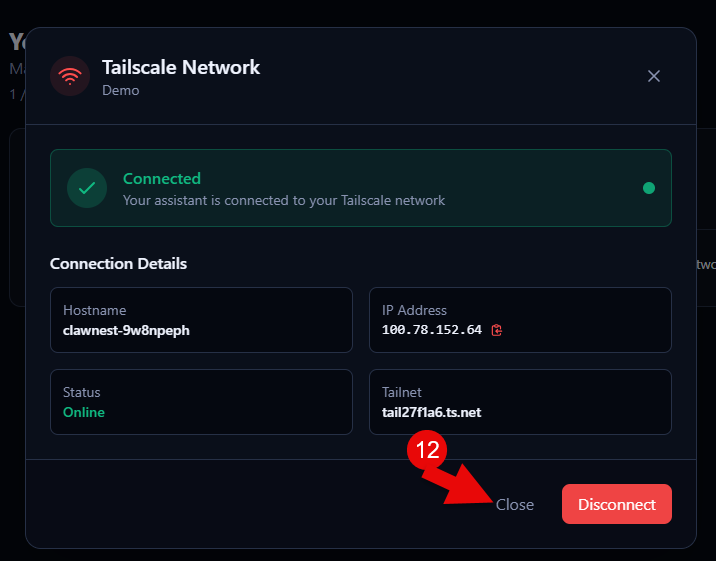
- 12
Verify the connection
The dialog now shows "Connected" with your hostname, IP address, and tailnet. Your assistant is online on your Tailscale network.
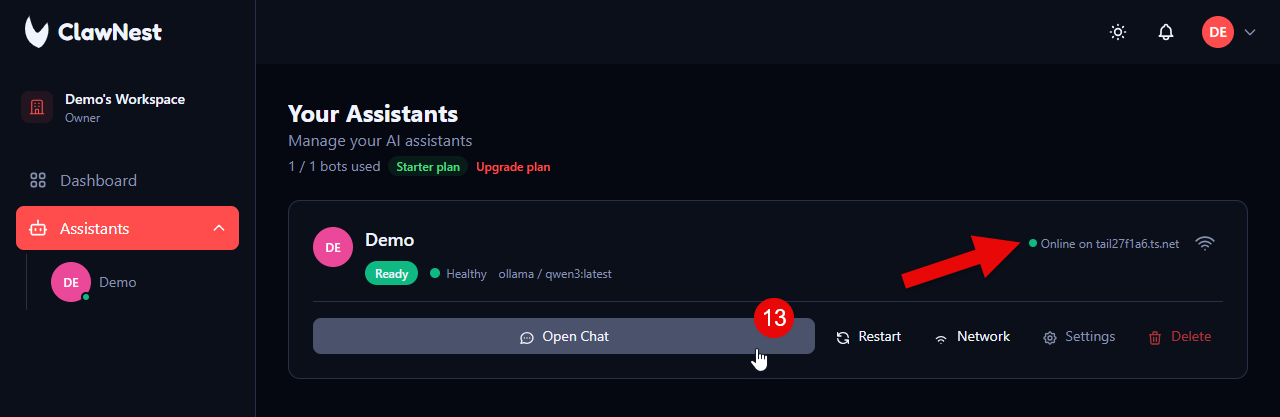
- 13
Open Chat and start using your local model
Back on the assistant card you'll see it's online on your tailnet. Click "Open Chat" to start chatting with your local Ollama model.
Next Steps
Now your local model is connected. Explore use cases or compare plans for production workloads.